Luxury Liner Pro & Luxury Liner
- Mass loaded vinyl is the only way to block out stubborn airborne sound waves
- Luxury Liner Pro is fused to a closed cell foam decoupling layer to create an unmatched automotive noise barrier
- Luxury Liner is just the MLV and is more commonly used for home and commercial applications
Where to Install
Automotive: Floor, cabin-side firewall, trunk/cargo, on top of wheel wells, doors, back wall
Home: Generator boxes, soundproof box, soundproof fence, walls, floor, ceilings, home theaters, recording studios, music rooms
Recommended Tools
- Utility Knife: Vinyl cuts easiest with a sharp utility knife. For straight cuts, use a T-square. A good pair of upholstery scissors will work as well.
- Adhesives (automotive): Luxury Liner Pro should always be adhered foam side down. Use Contact Spray Adhesive, Super Strong Double Sided Tape, or Dual Lock Reclosable Fasteners.
- Adhesives (MLV): Vinyl requires specific adhesives. Use our HH-66 Vinyl Contact Cement or DAP (from. the hardware store).
- In home application methods, use staples, screws, nails, or hang MLV with reinforced grommets. Use large washers to prevent MLV from tearing.
- We use foil tape to seal seams in automotive applications. In residential construction, use acoustic caulk.
Pro Tips
- Coverage Needed: as close to 100% as possible
- REMEMBER: the keys to an effective noise barrier are density and limpness of material + 100% coverage. You can buy the densest MLV on the market, but if you have huge gaps in coverage, your sound barrier will not be effective. This is especially true in residential applications where ensuring the wall or box is airtight is such a key factor.
- Never use MLV under the hood or directly next to a heat source. It can't take the heat and will melt without proper protection.
- ALWAYS use a decoupling layer for vehicle based applications. Without the soft foam or jute decoupler, the MLV will resonate off the hard metal surface and perform worse as a noise barrier. Luxury Liner Pro greatly simplifies your install by fusing the closed cell foam to the MLV.
- Only use adhesives designed for vinyl with Luxury Liner MLV (no closed cell foam). Vinyl contact cement is the preferred choice, but Dual Lock reclosable fasteners and our Super Strong Double Sided Tape will also work.
Installing Luxury Liner Pro in a Vehicle
- The goal is to create as close to 100% coverage as possible between you and the noise source. You are building a wall, and that wall needs to have as few gaps in as possible.
- Luxury Liner Pro should always be installed with the foam side facing down towards the application surface.
- An adhesive is not required for a horizontal surface (although it's recommended). For a vertical surface, you must use a strong adhesive. We recommend high-tack spray adhesive, super strong double sided acrylic tape, or Dual Lock reclosable fasteners.Spray Adhesive: Use ours or at least 3M 90. Spray on the foam and the application surface. Wait 60 seconds to tack up and then firmly press and hold.Super Strong Tape: Tape around the edges on the foam side. Then make a big X in the middle. Firmly press to application surface.Dual Lock: Use the strongest version (400/250 stem). Allow the adhesive to firmly bond to both the foam and the application surface. Otherwise, the "velcro" part will stay stuck but the adhesive backing could fail.
- If you have limited clearance to reinstall upholstery, trim the foam side of Luxury Liner Pro to thin the decoupling layer at the re-attach point.
- Tape the seams with foil tape. Sealing the seams will improve the integrity of your noise barrier.
Achieving Targeted Results with Luxury Liner Pro
- For engine noise, get as high up on the cabin side of the firewall as you can. You do not need to remove the dash, but if it's out already - you might as well extend your noise barrier all the way up.
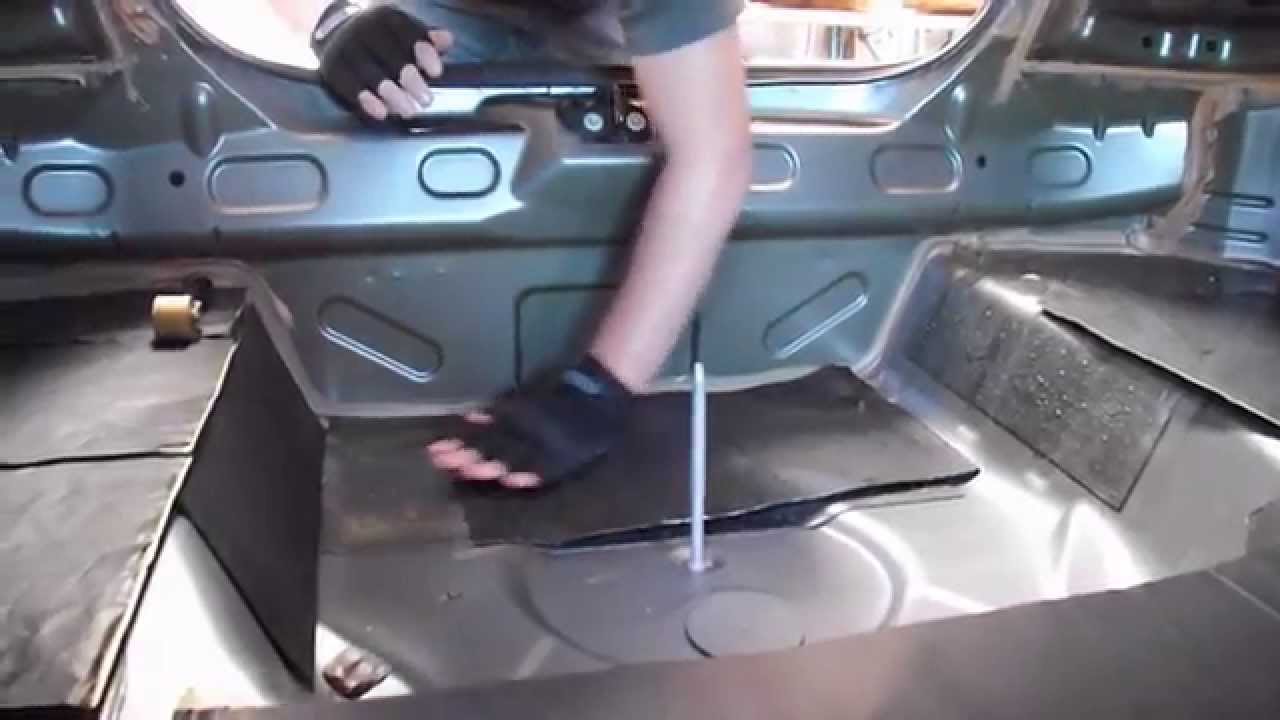
- For road noise, cover the entire floor, including over the top of the wheel wells. Cut as few gaps in your noise barrier as possible, but you will need to do this in some places (like to re-attach the seats).
- For exhaust noise, cover the entire floor of the trunk. The next priority after the trunk floor is the back wall behind and the rear seat and then to continue your coverage up the entire floor.
- For better mid-bass, install Luxury Liner Pro between the inner door skin and the door panel, sealing any holes in the door. The goal is to turn your door cavity into a subwoofer box. Use Dual Lock reclosable fasteners so you can access inside the door cavity later if ne
Install Steps

Step 1
Luxury Liner Pro should be installed on top of a constraint-layer damper, such as Damplifier Pro.Remove upholstery to expose the bare sheet metal or sound deadening. Cut the sheets to desired size using a sharp utility knife.

Step 2
If using an adhesive, clean metal with denatured alcohol and ensure no debris, rust, or waxy oils. Apply adhesive of choice and follow directions to ensure a proper bond.

Step 3
Do not cover wires, drain holes, or mechanical devices. The goal is to have as few gaps as possible in your noise barrier without interfering with the other parts of the car. Apply foam side down and tape the edges with foil tape to ensure barrier integrity.
Video Guides